Configure Low Code Add-on Features
Here, uncovers the power of the versatile and user-friendly suite of low-code ranges from RTMP and HLS Live Streaming to Co-Browsing, Virtual Backgrounds, Extend Embed, Encryption, and Watermarking.
To customise your video calling app with the features of your specific need, do the followings:
- In the Configure box, click on the Go button. This will direct you to the Low-Code Features interface.
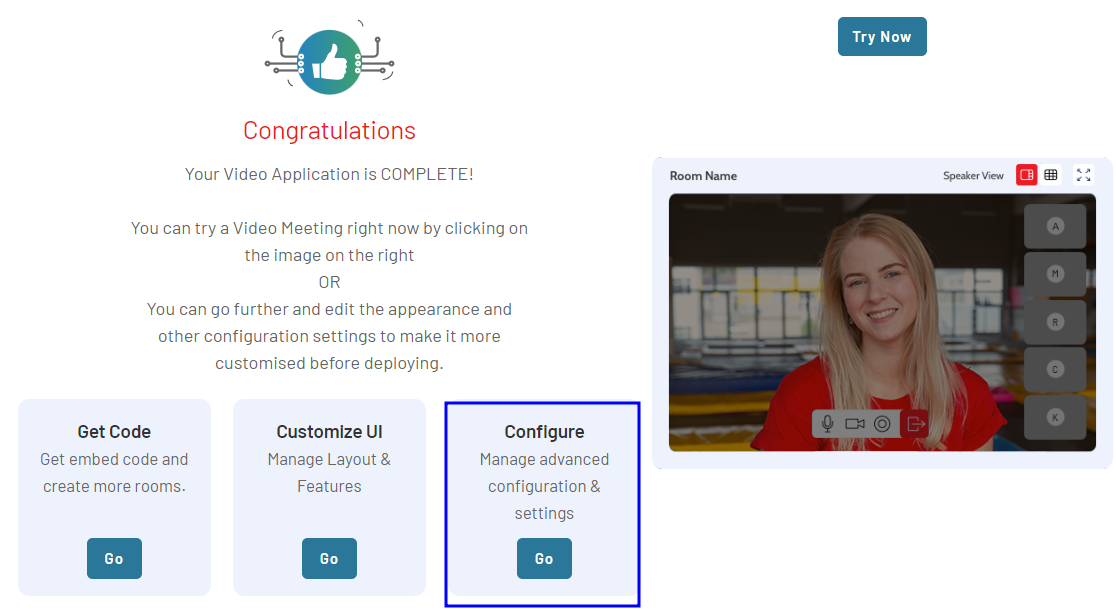
Alternatively, you can follow these steps to navigate to the Configure for the selected project:
-
Navigate the Video section in the left menu pane and select Dashboard option from the drop-down.
-
Select the project for which you want to configure advanced features. This will take you to the project summary page.
-
On the project summary page, select the Features tab.
-
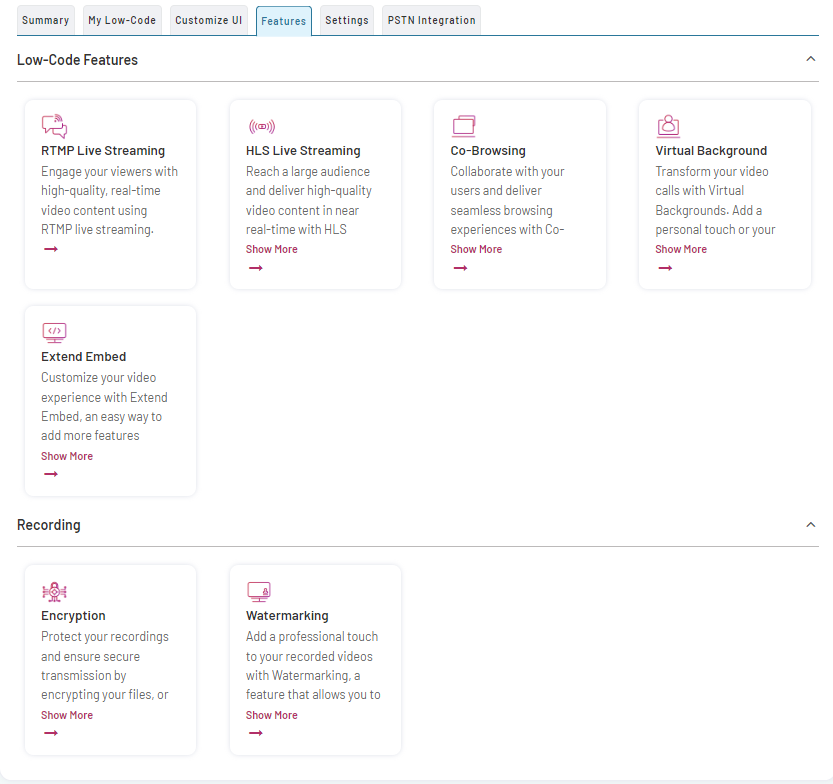
The Low Code Features interface will open, presenting you with a range of advanced features, including Live Streaming capabilities, Collaborative functionalities, Recording options, and other advanced features to enhance your development experience.
You can configure features and settings, automate application workflow, and add more features by using the following tabs:
Configure Live Streaming Features
Live Streaming capabilities engage viewers with high-quality, real-time video content.
Two types of streaming features are available: RTMP Live Streaming and HLS Live Streaming.
RTMP Live Streaming
To configure RTMP Live Streaming to your video application, follow these steps:
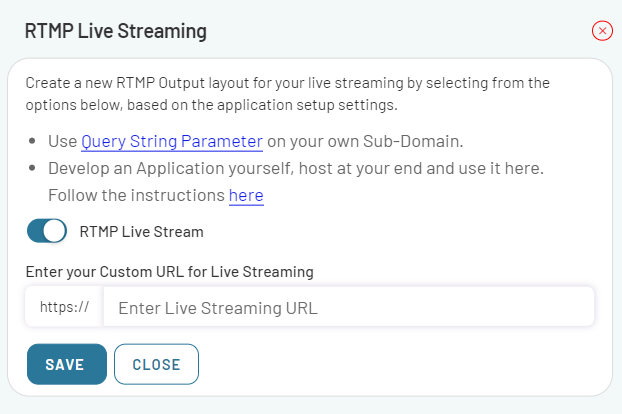
- Navigate and click the RTMP Live Streaming tab.
-
Toggle the RTMP Live Streaming feature to enable or disable it as per your requirement.
-
If you choose to enable live streaming, enter your Custom URL for live streaming starting with "https".
Note: The RTMP Output layout is dependent on the values specified during the application setup. You have the option to further customize the layout or create a completely new one by selecting from the following choices:
- Use the Query String Parameter on your own subdomain.
- Develop your own application, host it, and follow the instructions provided here.
HLS Live Streaming
To configure HLS Live Streaming to your video application, follow these steps:
-
Navigate and click the HLS Live Streaming tab.
-
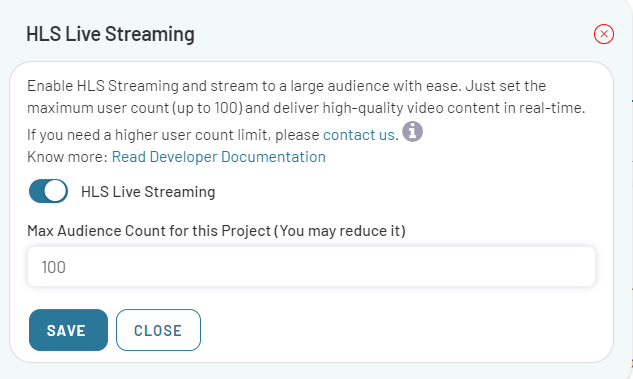
Toggle the HLS Live Streaming feature to enable or disable it as per your requirement.
Set the Maximum User Count
-
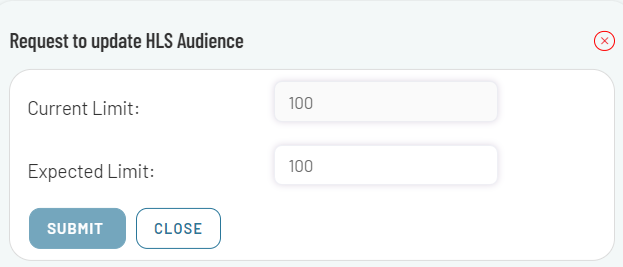
You can set the maximum user count for your project. By default, the limit is set to 100 viewers.
-
If needed, you have the option to reduce the maximum user count. However, if you require a higher user count limit, submit your request by clicking on the Contact Us link.
Configure Collaborative feature
Collaborative features enable real-time collaboration, allowing users to work together seamlessly through functionalities such as co-browsing.
Co-Browsing
Co-Browsing allows multiple users to browse and control the same web page or app simultaneously. If you have opted for this feature, you need to add the URLs of your web pages, app, or website to enable collaborative browsing on them. To configure Co-Browsing to your video application, do the following:
-
Navigate and click the Co-Browsing tab.
-
Toggle the Co-Browsing feature to enable or disable it as per your requirement.
This feature allows users to collaborate and navigate web pages together in real time.
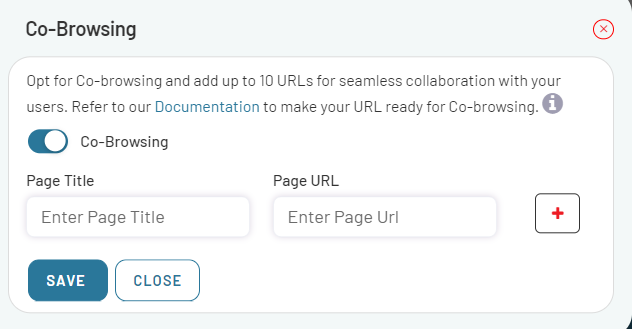
Enter the Page Title and URL
-
In the required field, enter the Page Title associated with the web page you want to share during Co-browsing.
-
Provide the corresponding URL of the web page.
-
You can add a maximum of 10 URLs for Co-browsing.
-
Click on SAVE button.
For more details about Co-Browsing, please refer to Co-Browsing
Configure Advanced Features
Virtual Background
To add an image as your background during a video call, do the following:
-
Navigate and click the Virtual Background tab.
-
Toggle the Virtual Background feature to enable or disable it as per your requirement.
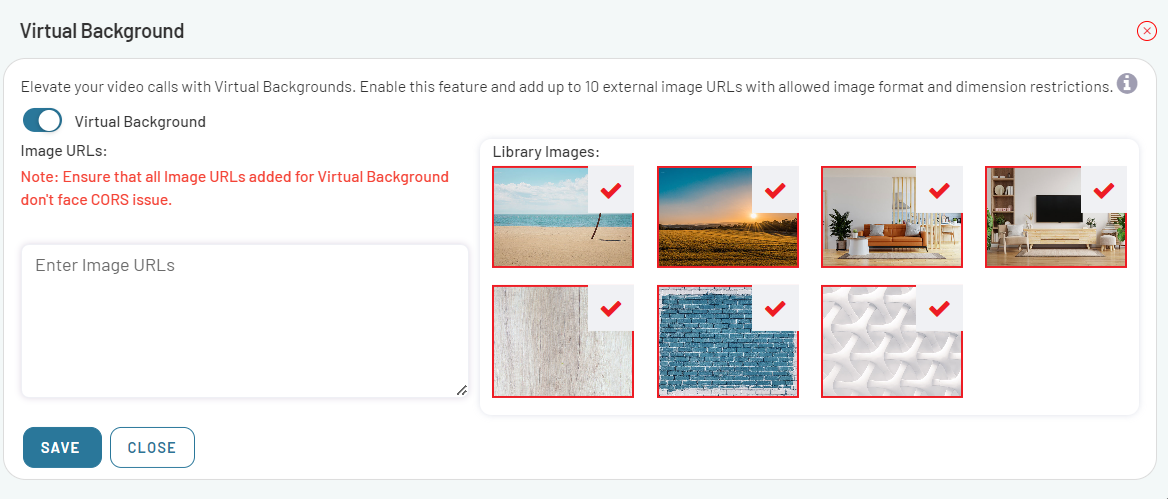
- Enter the desired image URLs.
Note: Ensure that all Image URLs added for Virtual Background do not face CORS (Cross-Origin Resource Sharing) issues.
-
Alternatively, You can choose from a selection of pre-existing images available in the library.
-
Once you have entered the desired image URL or selected an image from the existing library, click on SAVE button.
For more details about virtual Background, please refer to Virtual Background
Extend Video Embed
The Video Embed feature can be extended by incorporating your own JavaScript libraries, enabling you to introduce new functionalities, enhance the user interface and experience, and integrate with external CSS stylesheets. To add your own JavaScript library and customize your Video Embed, follow these steps:
-
Navigate and click the Extend Embed tab.
-
Select your preferred Script Type (such as JS and CSS).
-
Enter up to 5 URLs, starting with https://, to include the necessary JavaScript libraries.
-
Enter the URLs (up to 5) that point to your desired JS or CSS libraries, starting with https://.
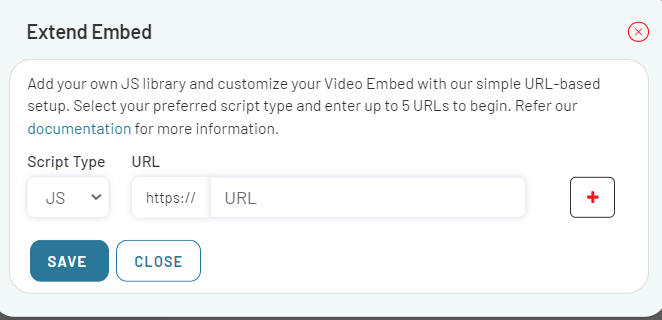
For detailed information, refer to Extend Video Embed.
Configure Recordings
Encryption
Video Recording Encryption is a feature that provides an additional layer of security for your EnableX Programmable Video Recordings. This feature allows you to encrypt your recordings with an encryption key, ensuring the confidentiality and integrity of the recorded content during storage and transmission. To encrypt your video recordings:
-
Navigate and click the Encryption feature tab.
-
Enter your Encryption key and click on SAVE button.
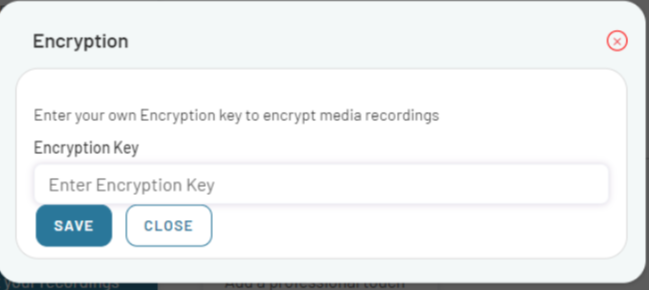
Note: Encryption is a service available with a subscription. When a user signs up for this service, the user himself needs to set an encryption key.
- If you are interested in the encryption service, please Contact Us .
Watermarking
To Add a professional touch to your recorded videos with Watermarking, a feature that allows you to place your own watermark on your videos, do the following:
-
Navigate and click the Watermarking feature tab.
-
Specify the mandatory settings to format the appearance of the watermark.
-
Upload Watermark Image by clicking Choose File.
Note: The Image should be a .png file, no larger than 50KB and 150*150 pixels in dimension.
- Adjust the Opacity of your watermark from 1 to 5 to set the transparency level.
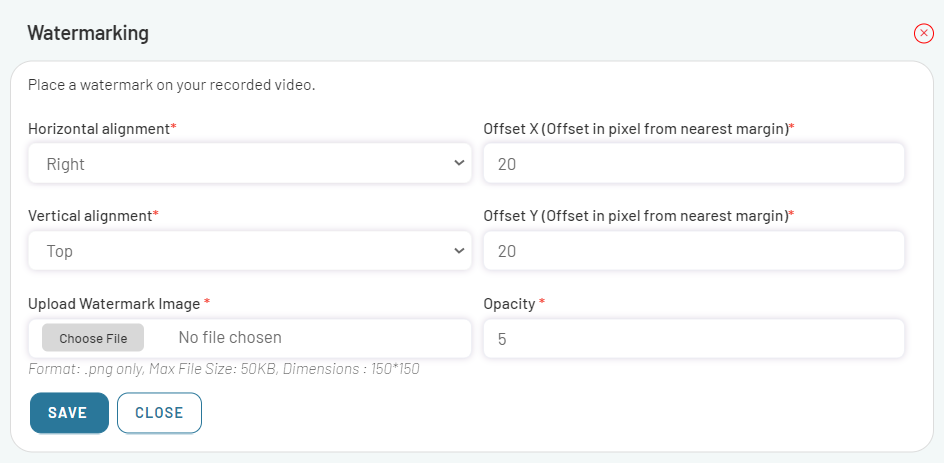
- Click on SAVE button.
After configuring the features, proceed to configuring the Low Code settings.