Pre-Requisites for Building Video Application
You must meet the following prerequisites for developing video applications using the EnableX platform:
- Add Video Service to your project
- Create a new video project
- Add Video to the existing projects
- Get App ID and App Key
- Get an SSL Certificate
Add Video Service to your project
To integrate Video API into your project, you need to create video project on EnableX platform. There are two ways to add video capabilities to your project:
- Create a New Project with Video Service: If you are starting a new project, you can create a fresh project and incorporate Video as a Service into it. This approach allows you to build your project from scratch while seamlessly integrating video functionalities.
- Add Video Service to an Existing Project: If you already have an ongoing project, you can enhance it by adding Video as a Service. This way, you can leverage the power of video communication within your existing project without the need for a complete overhaul.
Create new Video Project
To begin developing a video application with EnableX Video APIs, the first step is to create a project on the platform.
Follow these steps to create a project:
Path-1
- Login to the EnableX portal .
- If you do not have an account, sign up here.
- After successfully logging in, users are redirected to My Dashboard. From there, follow these steps to create a new project:
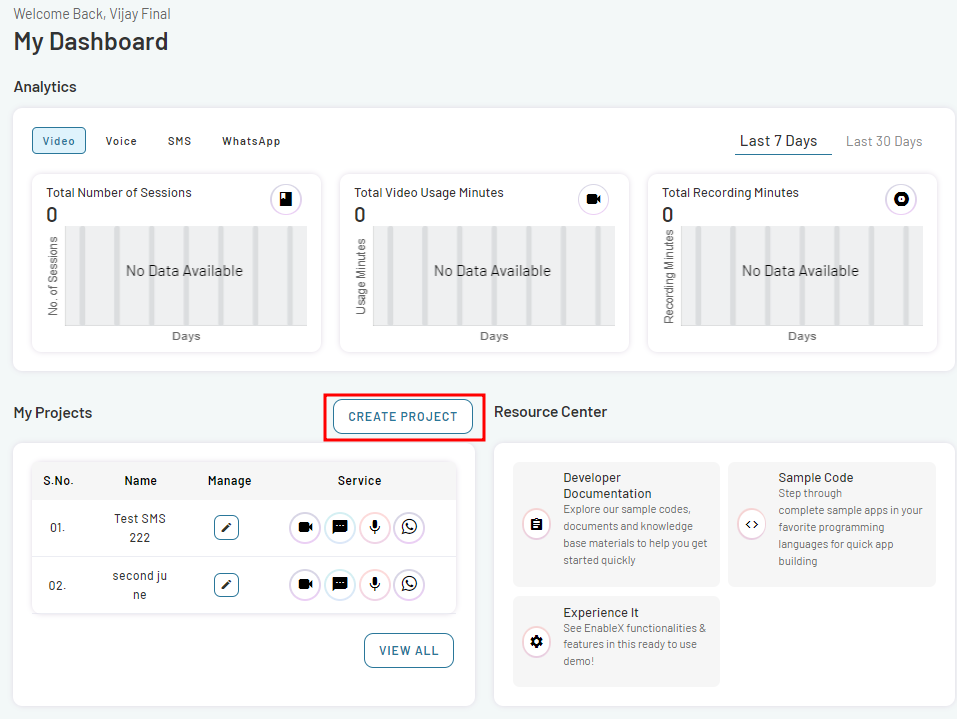
- Navigate My Projects section on the page.
- Click on CREATE PROJECT button. This opens Create Project page.

- Provide the necessary information for your project, including the Project Name, Application, and Project Description.
- Navigate the Channels section on the page. Within this section, you can enable specific services for your project.
- To add video service to your project, toggle video option in the Channels section.
- Click on CREATE PROJECT button to create your project.
- The project has been successfully created and a confirmation popup will appear.
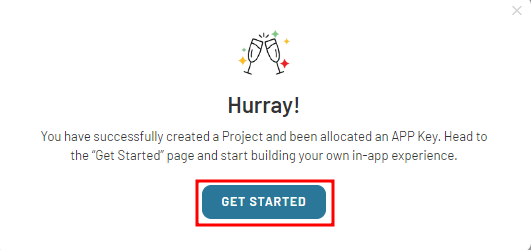
- In the pop-up dialog, click on GET STARTED button. This will take you to the next stage of the setup process.
- If the project creation process fails, review the previous page and ensure that all mandatory fields are completed.
- you can add more services to it by going to the My Projects section.
Path-2
- Navigate to My Dashboard
- Go to Left Menu Bar and select Video
- Navigate to the** My Video Projects** section
- Click on CREATE PROJECT
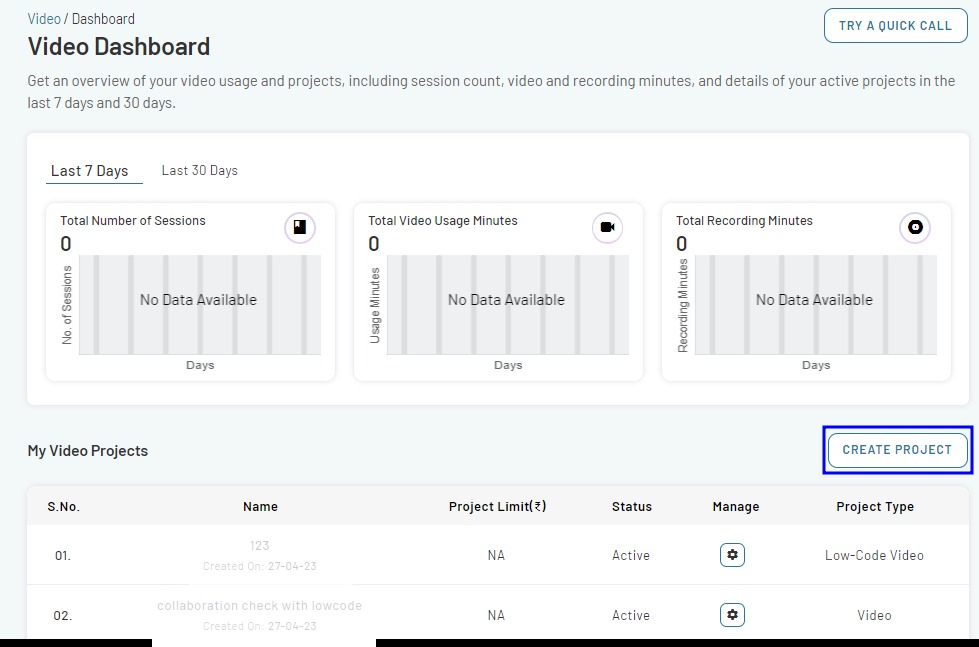
- This will take you to the same Create Project form as explained in Path-1.
- Follow the same process as explained.
- To proceed, click on the GET STARTED within the popup.
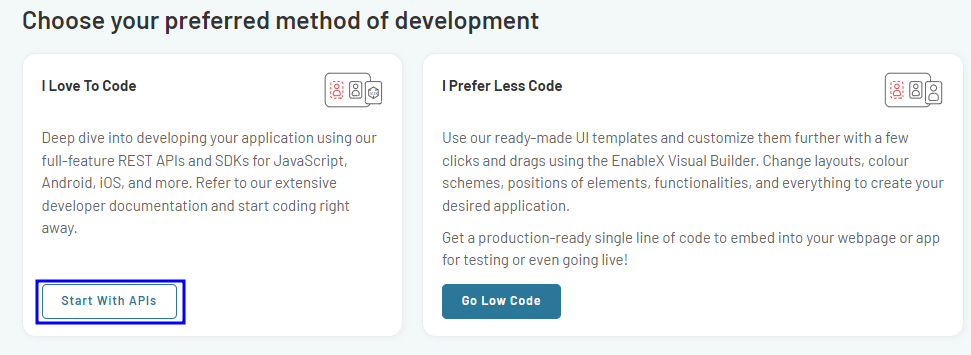
- Select the development method that best fits your preferences and requirements
- Select** I Love To Code** option from the available choices and click on Start With APIs.
This will give you access to the necessary APIs and SDKs for your project, enabling you to begin coding and developing your application with EnableX's extensive tools and resources.
Add Video Service to an Existing Project
This process involves a few simple steps to configure your Video integration within your existing projects, whether it is Voice, SMS or WhatsApp Project. To add video service to an existing project:
- Navigate to My Dashboard
- Go to My Projects section
- To add services to a project, select the project you want to modify and click on the Edit icon. This will open the Project Summary page.
- On the Project Summary page, navigate and click on EDIT Tab.

- An Edit Project Information form will open, using which you can add new services to the Project or remove any existing service.
- Enable Video option in the Channels section.
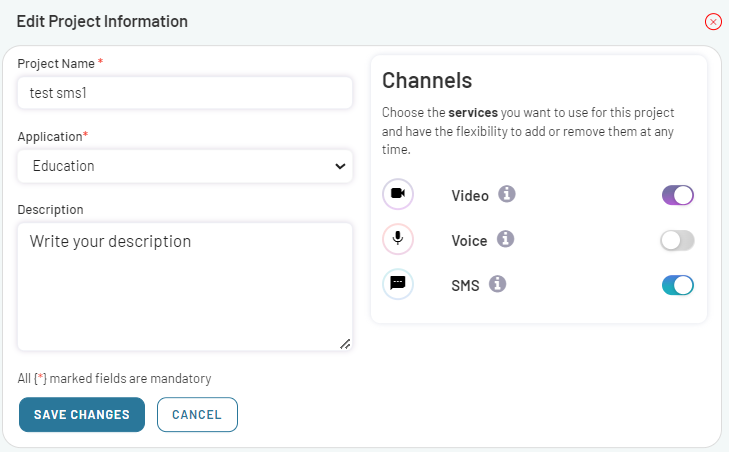
- Click on SAVE CHANGES.
- Video service has been integrated into your existing project.
- The updates will be immediately reflected on the Dashboard.
Get App ID and App Key
You require application credentials before developing a video application using the EnableX platform. These credentials consist of App ID, which is the username, and App Key, which is the password in the HTTP Base Authentication Request Header of our Video API Call.
When you create a project, the API Access Credentials are sent to you via email. However, you may need to reset API Key or resend API Credentials. Follow these steps to get your project’s access credentials reset or resend.
- Navigate to the My DASHBOARD, select the project you want credentials for, and then click on Manage icon.
![]()
- This will take you to the Project Summary page.
- Go to the Project Credentials section on this page.
- Locate the SEND CREDENTIALS and RESET APP KEY buttons.
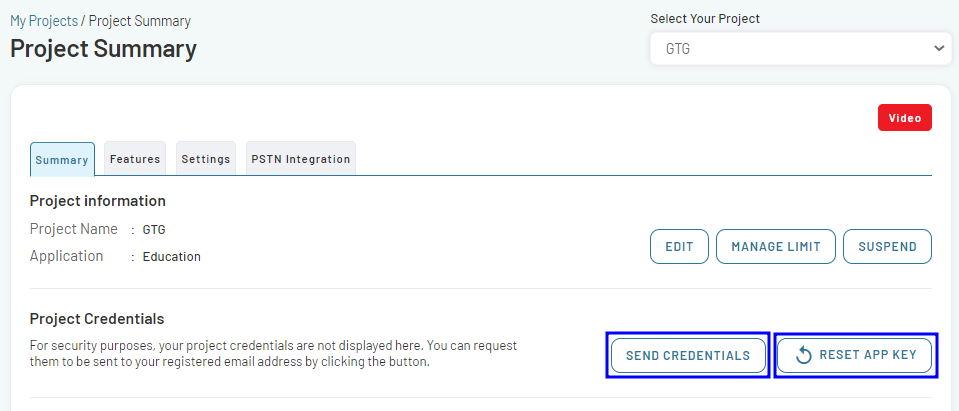
- If necessary, use the RESET APP KEY option to reset the application credentials.
- Use the SEND CREDENTIALS option to resend the application credentials to your registered email address.
- Now you have obtained the App ID and App Key, Use these in your Application Server for API Call.
Note: Make sure that you use the App ID as the username and the App Key as the password in the HTTP Base Authentication Request Header.
Get SSL Certificate
If you have created a Browser based Application, the Application Server serving the Video Session pages must run on https. You will require a valid SSL Certificate for your Application Server domain to connect to the EnableX platform. However, you may also use Self-Signed Certificate or Snakeoil Certificate to run the application locally. Below are a few ULRs to obtain a Self-Signed Certificate:
- A valid SSL Certificate (Secure Socket Layer) for your application server domain to connect to the EnableX platform.
- An SSL Certificate provides a secure connection between the application server domain and the EnableX platform. It ensures that all data passing between the two is encrypted, keeping it secure.
- A Self-Signed Certificate/Snakeoil Certificate to run the application locally.
- Note:** Self-signed or Snakeoil certificates are the certificates that are generated and verified by users or developers.
You can obtain a self-signed certificate from one of the following resources:
Use the SSL Certificate
After you have registered a certificate or created a self-signed certificate, upload a copy of the certificate files (.key and .crt files) to the application server.
- Keep the certificate files in a designated directory within the application server.
- Refer to these files with absolute paths in the
server/config.jsfile.