Bot Configuration
The Bot Configuration feature supports customizing and fine-tuning the bot's appearance, functionality, and integration. You can make it match your brand's style, decide how it should act on different platforms, and update contact info. Setting this upright makes sure the bot works well for users.
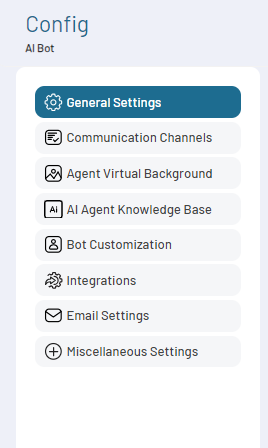
General Settings
In the General Configuration of the bot, users can:
- Check the default assigned Bot ID.
- Update the Name to the bot.
- Provide a Welcome Message that users will receive upon initiating a conversation with the bot.
- Check the Collect User Information checkbox if you want your bot to gather information from users in the web client.
- specify the types of information to collect, such as users name, phone number, and email address.
- You can also provide a title for the user information form to guide users when submitting their details.
Note: Fixed Parameters user.user_name is used for collecting the user's information during the interaction. You can set this parameter when you are building your bot in the canvas
- Check Self Initiated bot to allow the bot to initiate conversations automatically in the web client.
- Enter the Whitelist Domain(s) to ensure the bot operates within a secure and controlled web environment.
- Add specific label(s) to help organize and quickly identify the bot.
- Define the data columns to be used when storing information in spreadsheets. Name, Phone and Email columns are added by default. Add required column and press enter to save.
- Add Column(s) for google spreadshet. Read Googl Spreadsht Integration for more information.
- Set the status of the Bot i.e. Published or Drafted.
- Include any additional description or important details about the bot's purpose or functionality.

Note: Published bot can be rendered on a website. If the bot is in Drafted state, web client will not render it.
Communication Channels
Manage communication channels of your bot. To modify channel access, deselect any channel you wish to remove and save your preferences. Conversely, to expand your bot's reach with additional channels, select the desired channels ensuring they are first configured within your EnableX project. After selection, link them with the relevant project from the dropdown menu and confirm your changes by clicking Save button.
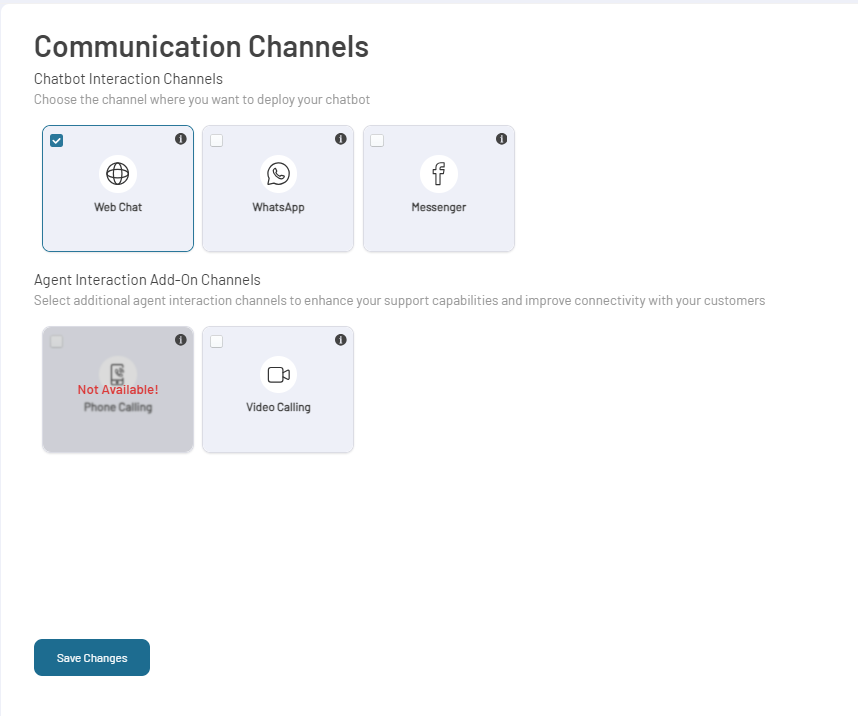
Note: Web Chat is always active by default, and Messenger does not require activation through a CPaaS project.
How to Configure Messenger
Complete the following steps to link your Bot with Messenger.
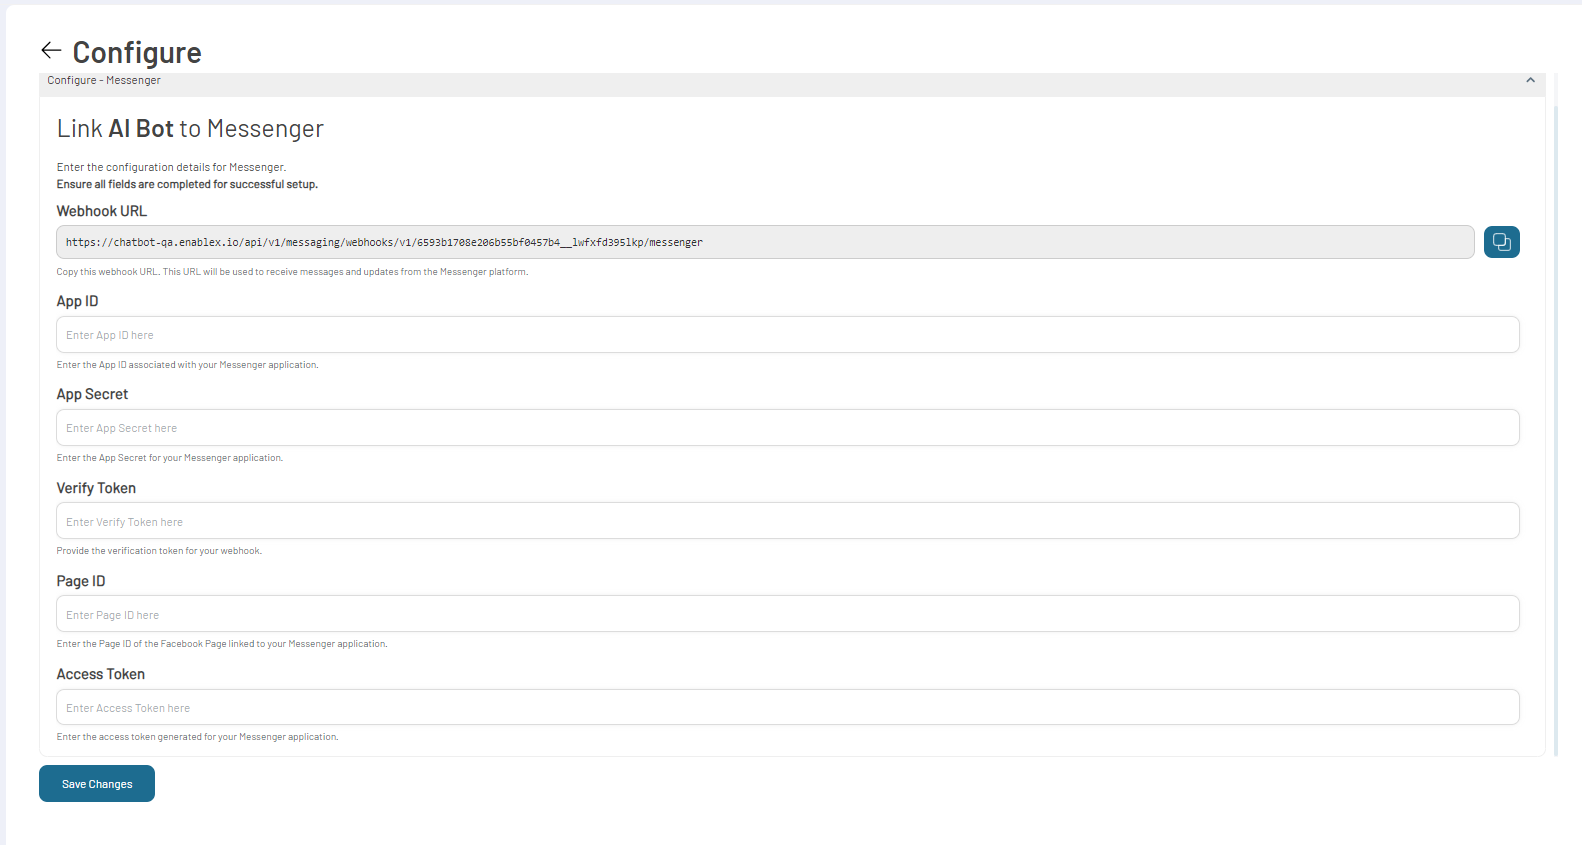
Webhook URL
- Navigate and copy the pre-filled Webhook URL, which is used to receive messages and updates from Messenger.
App ID
- Enter the App ID associated with your Messenger application. This ID identifies your application on Messenger.
App Secret
- Enter the App Secret of your Messenger application to ensure secure communication between your bot and Messenger.
Verify Token
- Provide the verification token you have created for your webhook to verify incoming requests from Messenger.
Page ID
- Enter the Page ID of the Facebook Page linked to your Messenger application to connect your bot to the specific page.
Access Token
-
Input the Access Token generated for your Messenger application, allowing your bot to authenticate and interact through Messenger.
-
Click Save Changes.
Step-by-Step Guide to Configure Your Bot with Messenger Using a Facebook Business Account
Create a Meta App
- Log into your Facebook Business account and navigate to the Meta for Developers website.
- Select My Apps from the top menu, then choose Create App.
- Opt for the app type that best suits your business needs and provide a name for your app.
Add Messenger to Your App
- Access the dashboard of your new app.
- Navigate the Add a Product section and select Messenger to add it to your app.
Configure App Settings
- Go to the Settings > Basic section to find your App ID and App Secret.
- Enter your Display Name and App Domain.
- Add your Privacy Policy URL and Terms of Service URL.
- Select the App Category.
- Complete the form with other required details.
Get Page ID
- Navigate the About section of your Facebook Business Page and found the Page ID.
Generate Access Token
- Navigate to the Messenger Settings within your app dashboard.
- Under Token Generation select your Facebook Business Page to generate an Access Token.
Setup Webhook
- Navigate to the Messenger Settings within your app dashboard.
- In the webhook section, click Configure Webhook.
- Configure your Callback URL where your bot will receive messages and verify token in the EnableX Dialogs messenger configuration.
- Enter the URL, input the verification token you've created, and select the webhook subscription fields you need.
Verify Token
- Enter a verification token you have set in messenger configuration. This token will be used by Facebook to verify the connection to your webhook.
Once all steps are completed, your bot is ready to interact with users on Messenger.
Agent Session Configuration
The Agent Session Configuration screen allows administrators to customize messages for human-agent interactions and set session timeouts. This screen includes the following fields:
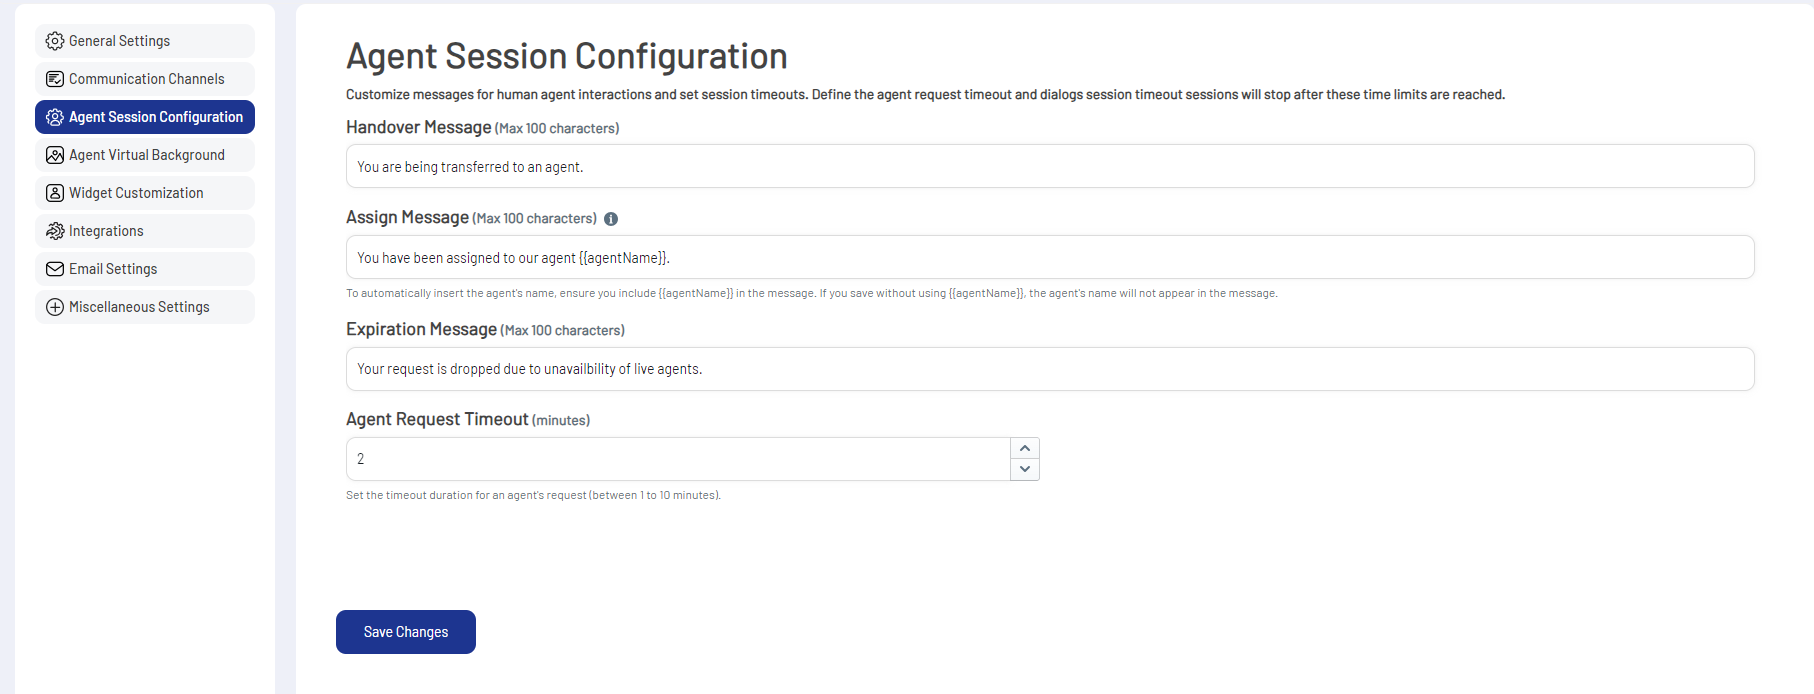
Handover Message
- Configure a message displayed when a user is transferred to an agent.
Assign Message
- Set a message shown when a user is assigned to a specific agent, with an option to include the agent's name dynamically.
Expiration Message
- Define a message that appears when a request is dropped due to unavailability of agents.
Agent Request Timeout
-
Specify the timeout duration for agent requests, ranging from 1 to 10 minutes.
-
Click Save Changes to save the configurations.
Agent Virtual Background
Enhance your video conversations by setting a virtual background image for your agents. Follow these steps:
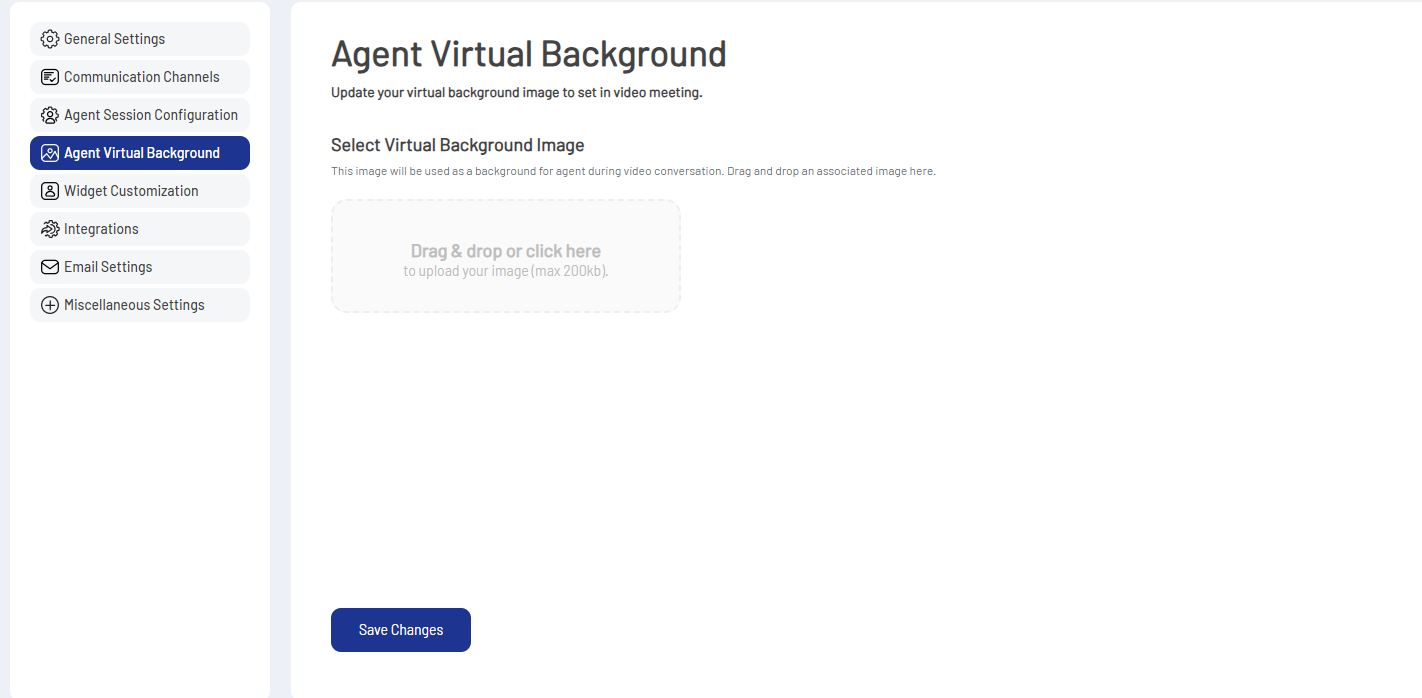
Upload Image
- Drag and drop your desired image here.
Save Changes
- Click Save Changes to apply the new virtual background for all agents.
AI Agent Knoweledge base
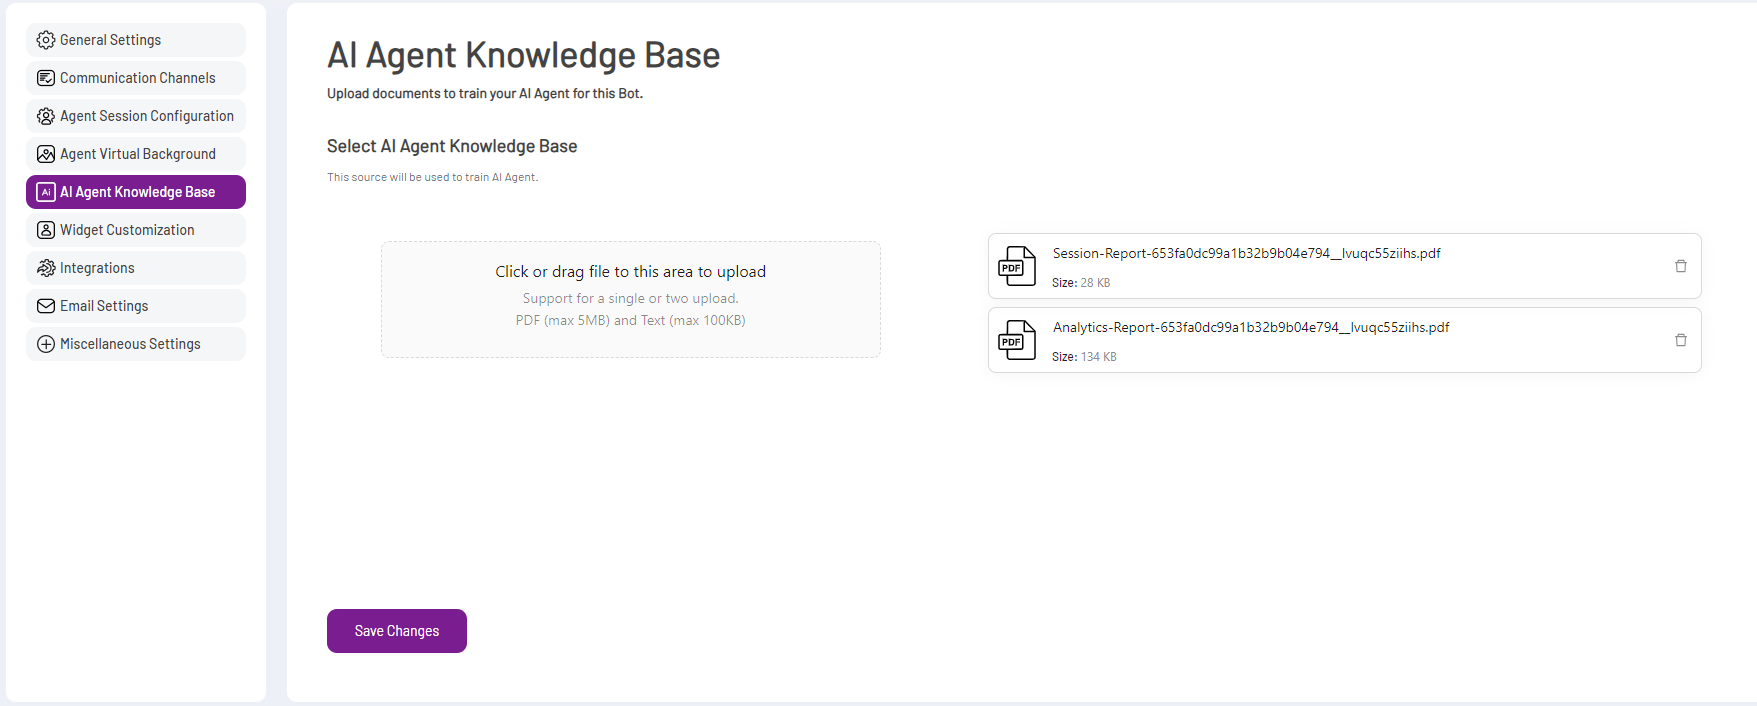
The AI Agent Knowledge Base screen allows you to upload documents to train your AI agent for improved response accuracy. Follow these steps:
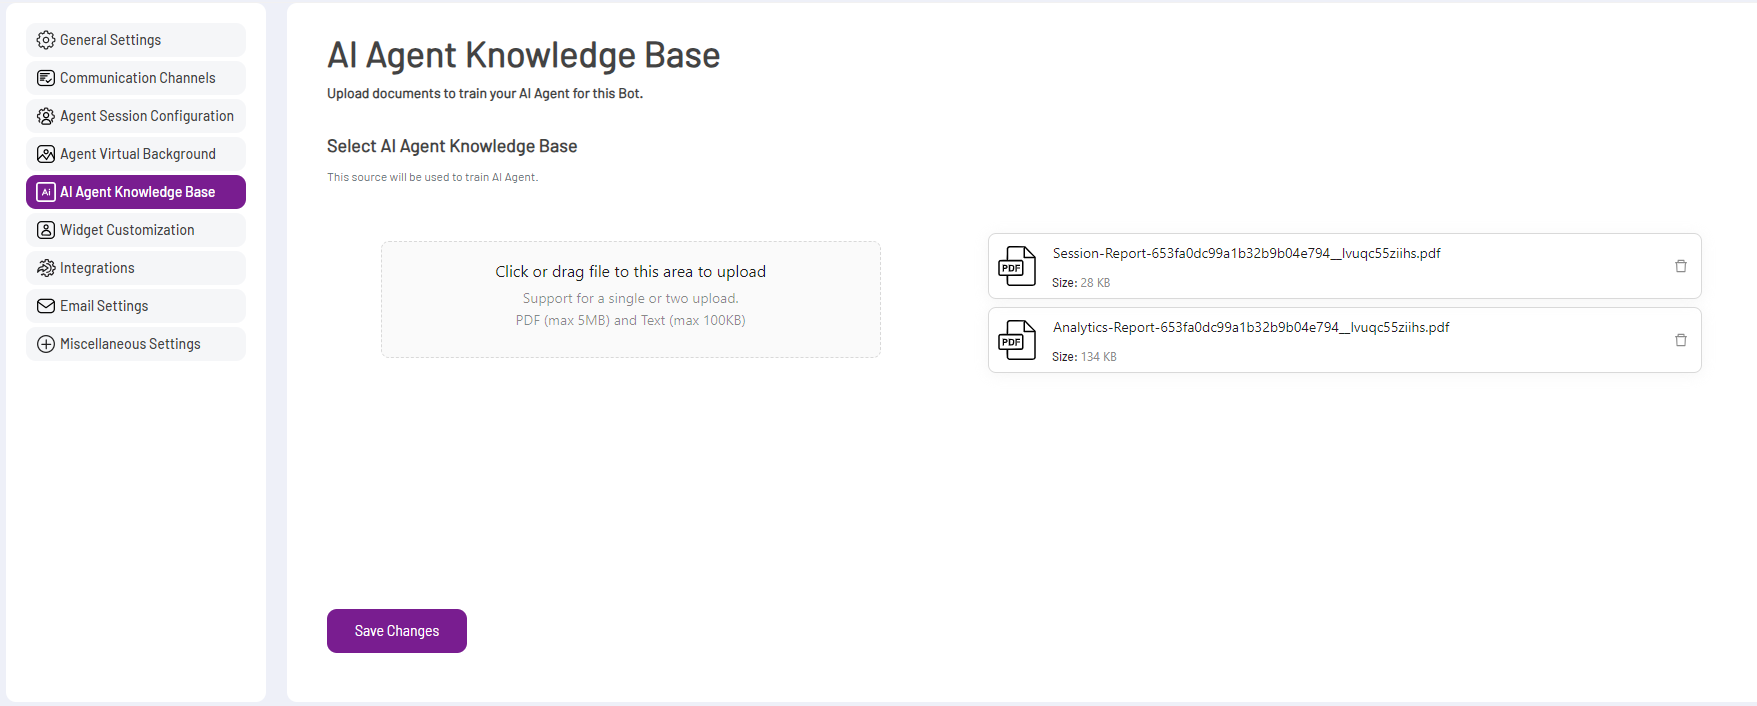
Select AI Agent Knowledge Base
- This will be used to train the AI agent.
Upload Documents
- Click or drag files to the upload area.
- Supported file types are PDF (max 5MB) and Text (max 100KB).
Note: The Knowledge-Based AI Agent is a subscription-based service and currently limited.
- After uploading the necessary documents, click Save Changes to apply the new training data to your AI agent.
Widget Customization
The Widget Customization screen allows you to personalize your bot's appearance and profile image. Here are the configurable options:
Welcome Message
- Enter a message to greet users when they initiate a chat with the bot.
Select a Profile Image
- Upload an image that will represent the bot during interactions. Drag and drop your image (max 200KB) into the designated area.
Select Chat Theme Colour
-
Choose a colour for the chat widget's theme. Adjust the colour to match your branding.
-
After making your selections, click Save Changes to apply the customizations.
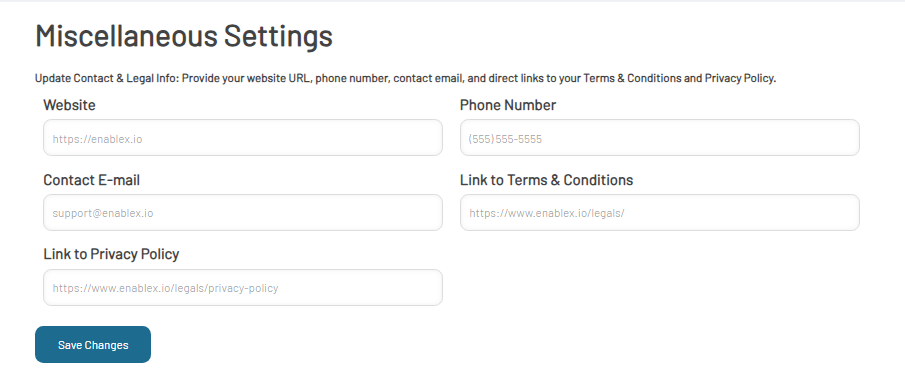
Miscellaneous Settings
Here organisations can put in their contact information and links to important documents like Terms & Conditions and Privacy Policy. This helps users reach out about the bot's rules and privacy.
Bot Profile Image
You can set an avatar (profile Image) that becomes the face of your bot, making it more relatable and visually appealing to the users.
- Choose a Bot Thumbnail that aligns with your brand's visuals.
![]()
- Save the changes by clicking Save Changes.
Email Settings
Configure your bot's email functionality to enable it to send emails as part of its conversational flow. Enter the details of your chosen SMTP server to ensure reliable and secure email communication.

- Host: Input the address of the SMTP server provided by your email service.
- Port: Specify the port number for the SMTP server connection.
- User: Enter the username associated with your email server account.
- Password: Type in the password for your email account.
- After entering the necessary information, click on Save Changes to activate the bot's email capabilities.