Voice Bot
-
A voice bot is an AI-powered system that interacts with users through voice commands and responses. It utilizes speech recognition and natural language processing (NLP) to understand spoken language and generate appropriate verbal responses.
-
Voice as a communication channel involves using spoken language for interactions between humans and machines. A voice bot can communicate with users through a business phone number. When users call this number, the voice bot can listen to their requests using speech recognition and respond verbally using text-to-speech.
Key Features of Voice Bots
- Speech Recognition: Converts spoken words into text.
- Text-to-Speech (TTS): Converts text responses back into spoken language.
- Natural Language Understanding (NLU): Interprets the meaning and intent behind the spoken words.
- Contextual Awareness: Maintains context over the course of a conversation to provide relevant responses.
- Integration Capabilities: Can connect with backend systems and databases to fetch or update information.
Getting Started with Voice Bot
To get started with the EnableX Dialogs voice bot, follow these steps:
Pre-requisites
- EnableX project with voice service enabled: Log in to the EnableX portal and create a new Project with voice service capabilities. If you have an existing voice project, configure your bot with this project.
- A Business Phone Number: For a voice bot services, you must have an inbound business phone number with this project. This number will serve as your voice bot number. If you have an existing phone number, simply configure it to your project.
Please read:
how to configure a phone number
Once your EnableX project issues created, proceed to the Chatbot Dashboard and follow the next steps.
Create Workspace
Once EnableX project is created,the next step is to create a workspace. This is a mandatory step.
What is Workspace?
A Workspace is a shared virtual environment where you can manage the whole life of your chatbots. A Workspace allows you to:
- Create new bot/bots or import existing bot.
- Manage your bots; Edit, delete and train.
- Add different users' role to collaborate.
Note: You can create more than one bot within a single workspace.
Read: How to create a workspace
Link Workspace with voice project
To allow your voice bot to use the voice services and the business phone number as a voice bot number, you need to link the workspace with the EnableX voice project. Note: One voice project can only be linked to one voice bot. If you plan on creating multiple voice bots, ensure you create corresponding voice projects. Read: Link workspace with voice project
Build a Voice Bot
After successfully setting up your EnableX projects, creating a workspace, and linking these projects to the workspace, you are now ready to initiate the chatbot creation process. Process of Creating to Deploying Chatbot Engine On the chatbot portal, within the designated workspace, you can manage the entire lifecycle of your bot, from its creation all the way to its deployment.
Read: How to build a chatbot
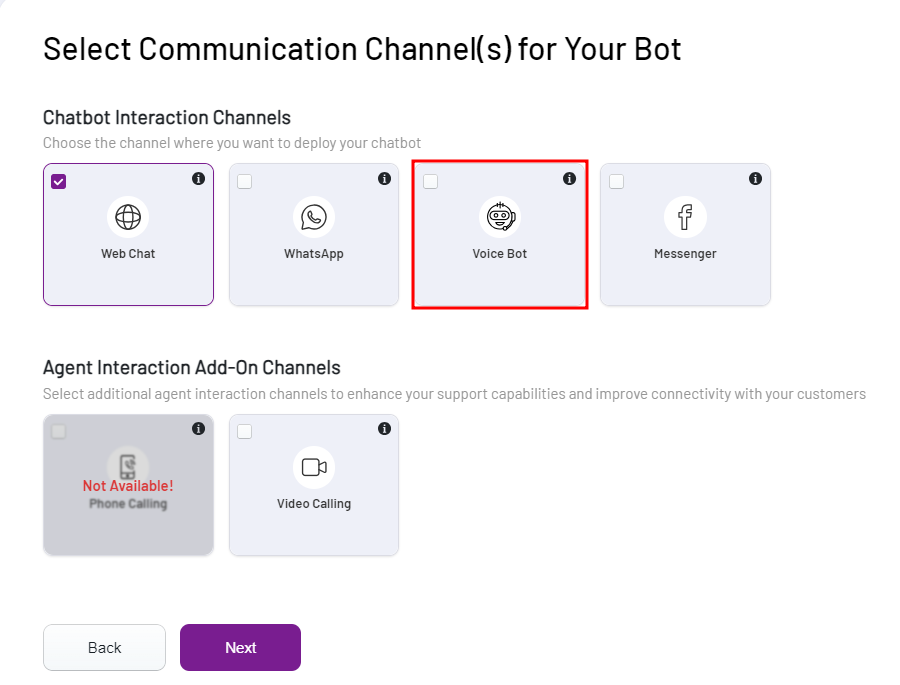
Select Voice Bot as a communication channel
- Start by defining the name and selecting a profile image for your bot.
- Choose Voice Bot a communication channel for your bot deployment.
Note: The Web channel is active for all bots by default, ensuring they are always accessible via web platforms, regardless of any additional channels or services integrated.

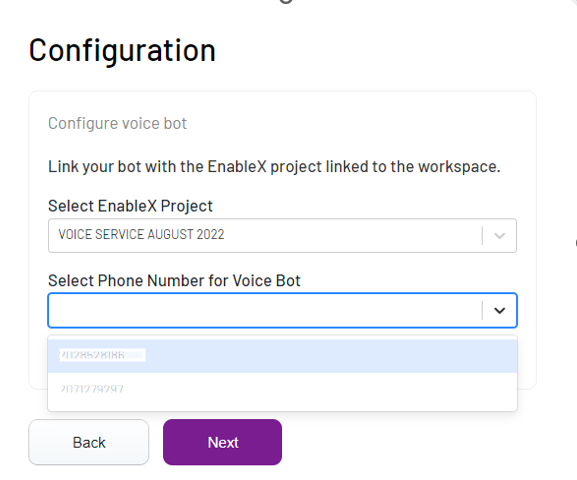
- Choose EnableX project from the dropdown list.
- Open Select Phone Number for Voice Bot dropdown and select a Phone Number.

- In the Select Your Bot's Template interface, choose a predefined call flow template or the Empty Bot template to design your call flow from scratch.
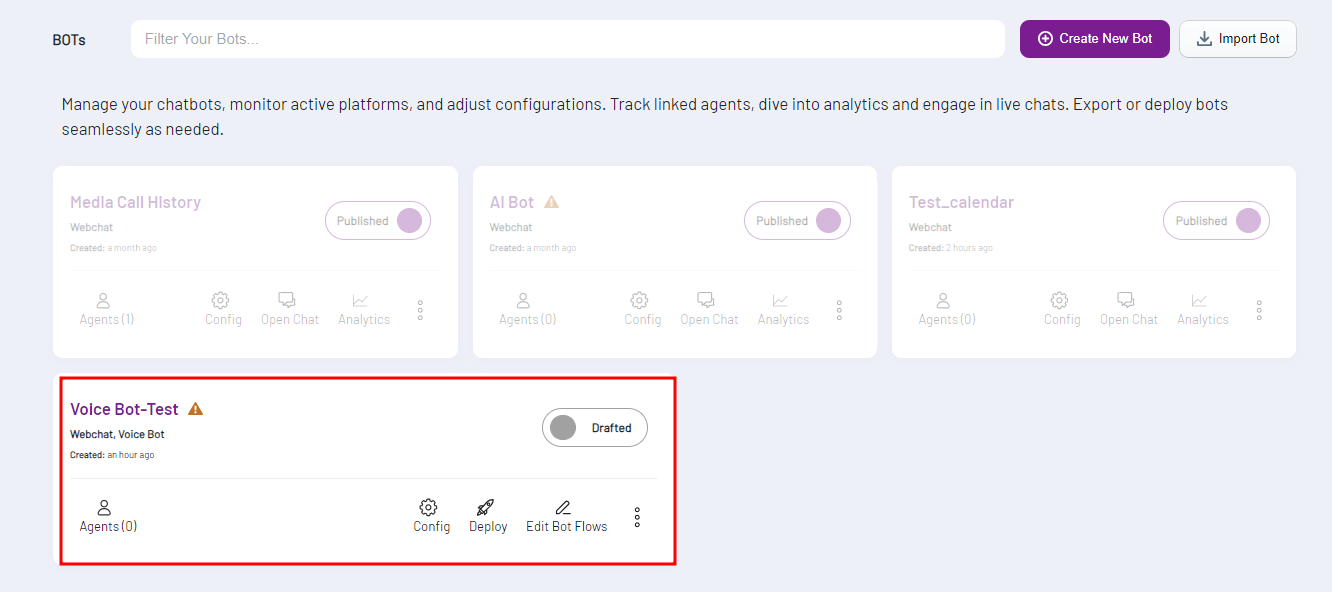
- A confirmation popup will confirm the creation of your bot.

Note: The newly created bot will be in the draft stage. To execute further operations, switch the status from Draft to Published by toggling the corresponding button.
Deploy your Voice Bot
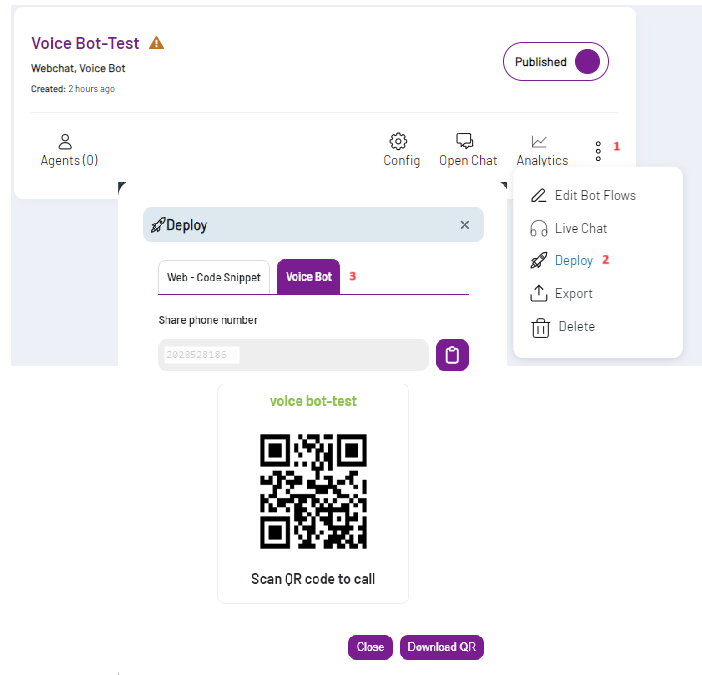
Once your voice bot is successfully created:
- Go to the ellipse (three dots) section.
- Select Deploy and then Voice Bot.
- You will receive a QR Code and the voice bot-enabled Phone number.
- Download the QR Code or copy the phone number and deploy it wherever required.
