Recording Delivery
EnableX Video Recording Delivery service allows you to upload the recorded video session to your preferred server that you have selected in your project. Recorded files are transferred in batches rather than an instant upload.
Deliver files to The Recording Delivery Service current supports file transfer to the following services or host servers:
- FTP/SFTP
- SCP
- AWS S3
- Google Drive
- Microsoft Azure
Set Up Recording Delivery
The Recording Delivery service is based on individual project settings. Each project can have different delivery mode and access details. However, you can use the same delivery mode and access details for multiple projects. The service organizes the transferred files in sub-folders that are named after room-id/conf-num for easy reference.
To set up the Recording Delivery service:
- Login to the EnableX portal .
- Navigate My Projects section .
- Click on CREATE PROJECT button,provide the necessary information for your project,toggle video option in the Channels section, and click on CREATE PROJECT button.
- The project has been successfully created and a confirmation popup will appear.
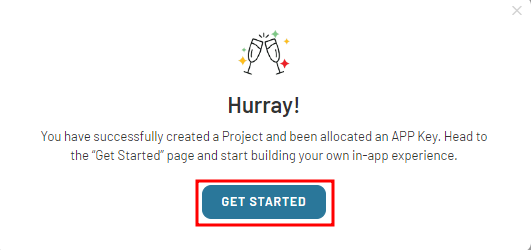
- To proceed, click on the GET STARTEDwithin the popup.
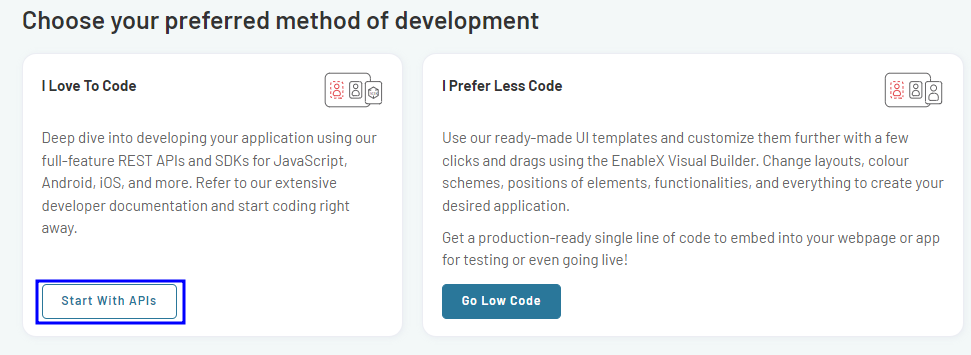
- Select the development method that best fits your preferences and requirements
- Select I Love To Code tab from the available choices and click on Start With APIs button. This will direct you to the Project Summary Page.
- Select I Prefer Less Code tab from the available choices and click on Go Low Code button. This will direct you to the Project Summary Page.
- Select the Settings Tab.
For low-code
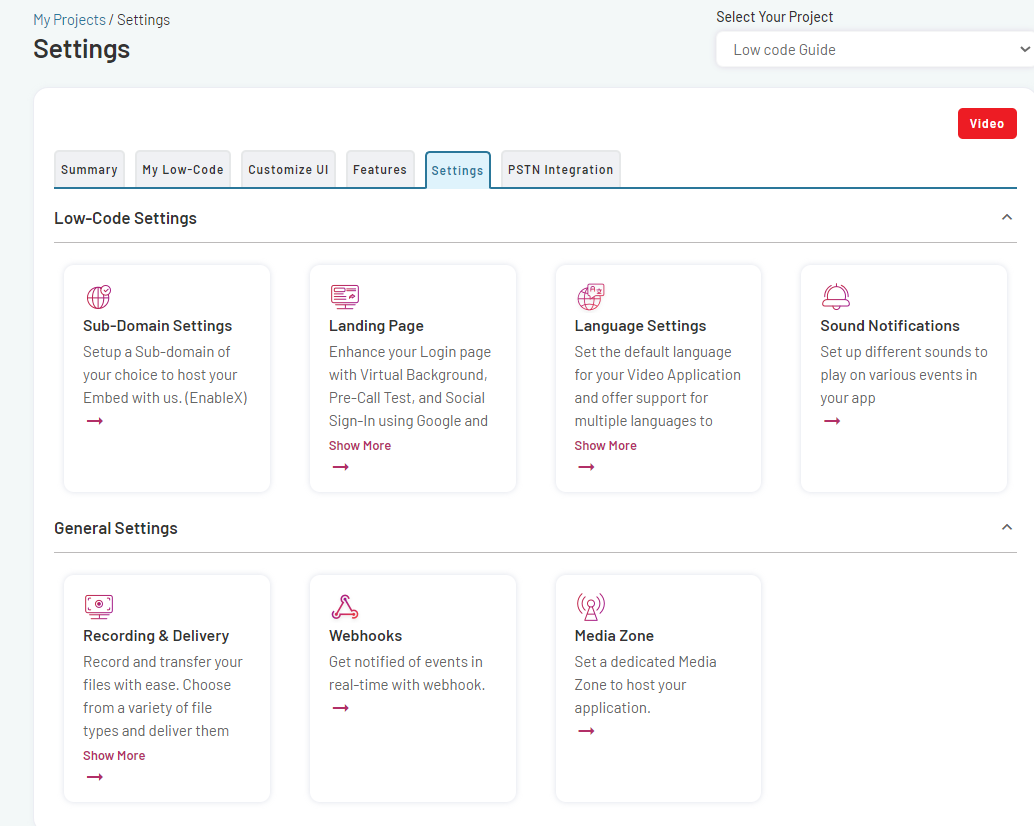
For code yourself
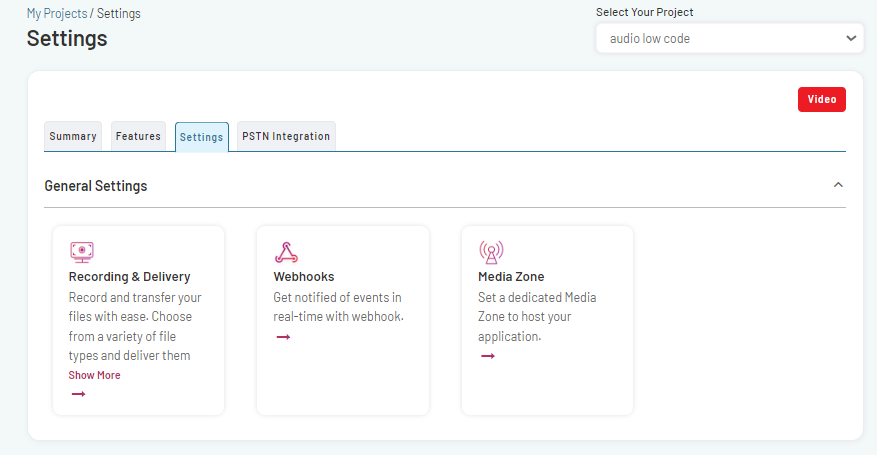
Recording and Delivery Settings
- Navigate to the Recording & Delivery tab.
On the Recording & Delivery page, you have the option to choose the file types to deliver and specify the destination for the recorded files.
To configure these settings:
Deliver File Types
Select the file type(s) you want to include in the delivery of recorded content. The available options in this case are:
- **Individual Recording:**Deliver each recording as a separate file.
- Live Recording: Deliver recorded content from live sessions.
- Transcoded: Deliver the content in a transcoded format.
- Meta data: Include metadata associated with the recorded content.
- Chat data: Include the chat data from the recorded sessions.

Deliver files to: Select the destination where the recorded file(s) will be delivered. Available destination options are:
- FTP to my server
- Secure a copy to my server
- Save on AWS S3
- Save on Google Drive
- Save on Microsoft Azure
Transfer to FTP/SFTP Host
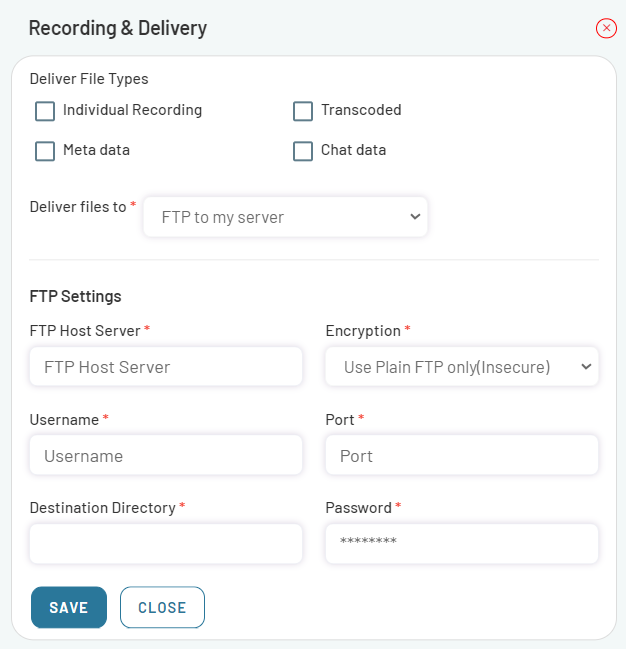
- Select FTP to my server from the Deliver files to drop-down list.
- The FTP to my server section will display on the recording & delivery page.
-
Specify the details required for file transfer.This includes:
- FTP server details: Enter the hostname or IP address of the FTP server where you want to transfer the files.
- Username: Specify the username associated with your FTP server account.
- Password: Enter the password for the provided username.
- Port (optional): If required, provide the port number for the FTP connection. If left blank, it will typically use the standard FTP port.
-
Click on SAVE to submit the specified details.
The files will be transferred to the specified FTP server.
Transfer to using SCP
- Select Secure copy to my server from the Deliver files to drop-down list.
- The SFTP Settings section will display on the recording & delivery page.
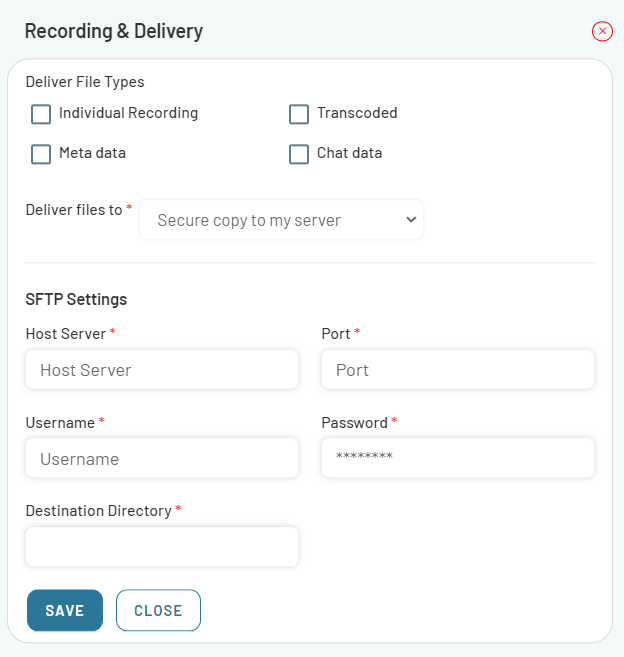
- Specify the details required for file transfer.
- Fill in the form as needed and submit it by clicking on SAVE button.
Transfer to AWS S3
- Select Save on AWS S3 from the Deliver files to drop-down list.
- The AWS S3 Settings section will display on the recording & delivery page.
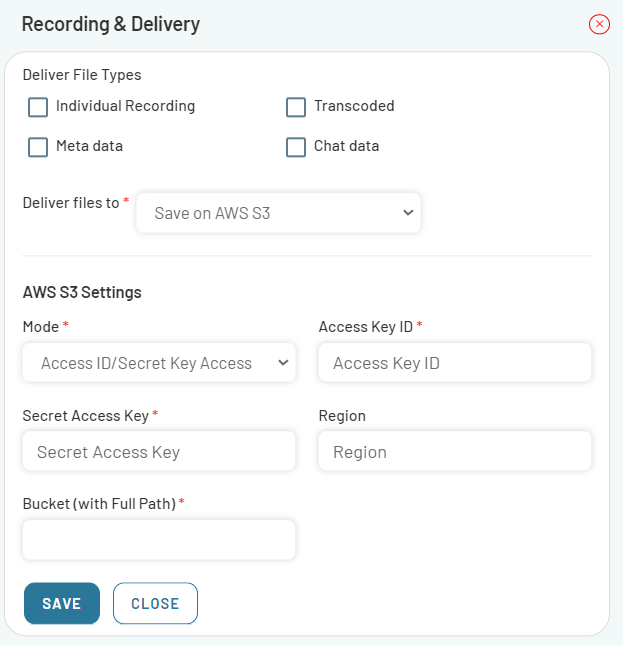
- Specify the details required for file transfer.
- Fill in the form as needed and submit it by clicking on SAVE button.
Transfer to Google Drive
- Select Save on Google drive from the Deliver files to drop-down list.
- The Google drive Settings section will display on the recording & delivery page.
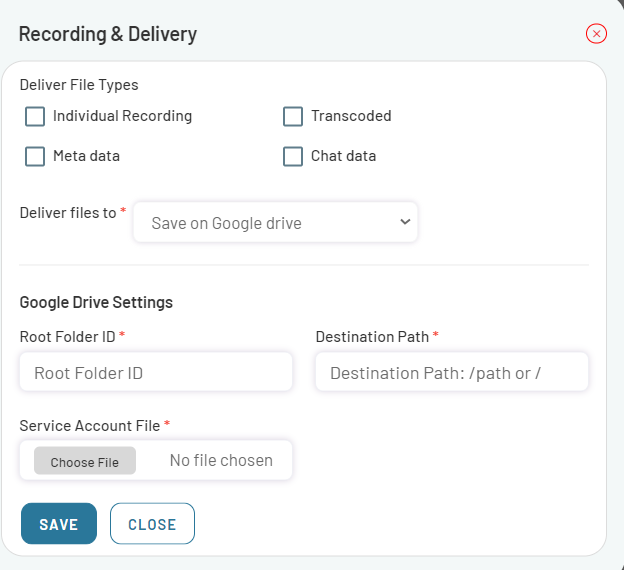
-
Specify the details required for file transfer.
-
Fill in the form as needed and submit it by clicking on SAVE button.
Transfer to Microsoft Azure
- Select Save on Microsoft Azure from the Deliver files to drop-down list.
- The Microsoft Azure Settings section will display on the recording & delivery page.
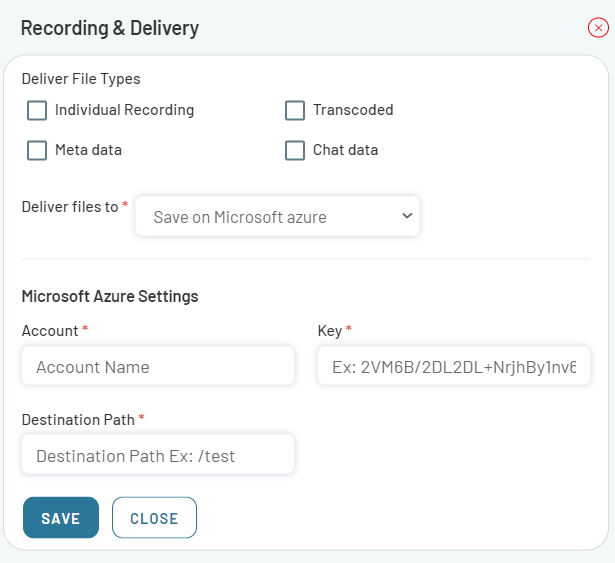
- Specify the details required for file transfer.
- Fill in the form as needed and submit it by clicking on SAVE button.
Delivery Notification
EnableX notifies your application when a file is successfully transferred though an HTTP post on a designated Webhook URL. For more information about notification webhooks, see Notification Webhook.
Other Ways of Accessing Recordings
In case you don't want to use the Recording Delivery service, you can access the video session recordings through the Server API and the EnableX portal.
Using the Server API
You can obtain the list of recordings by issuing an HTTP GET request to its archive route. The following filters can be used to fetch the recordings:
- For a period with a specified date range.
- For a Room ID.
- For a Room ID within a specified period.
- For a specific session for a particular conference number.
After getting the report of the recording files, if you want to download these files individually, issue an HTTP GET request to each of the URLs specified in the report. For more information, see Get Recordings & Chat-Scripts
Using the Portal Report
The EnableX portal provides several filter options to download the report containing the video session recordings. The report contains direct download links for individual recording files, live recording files, and transcoded files.
Note: The download link expires after 72 hours.
Perform the following steps to download the recording files:
- Log in to the EnableX portal.
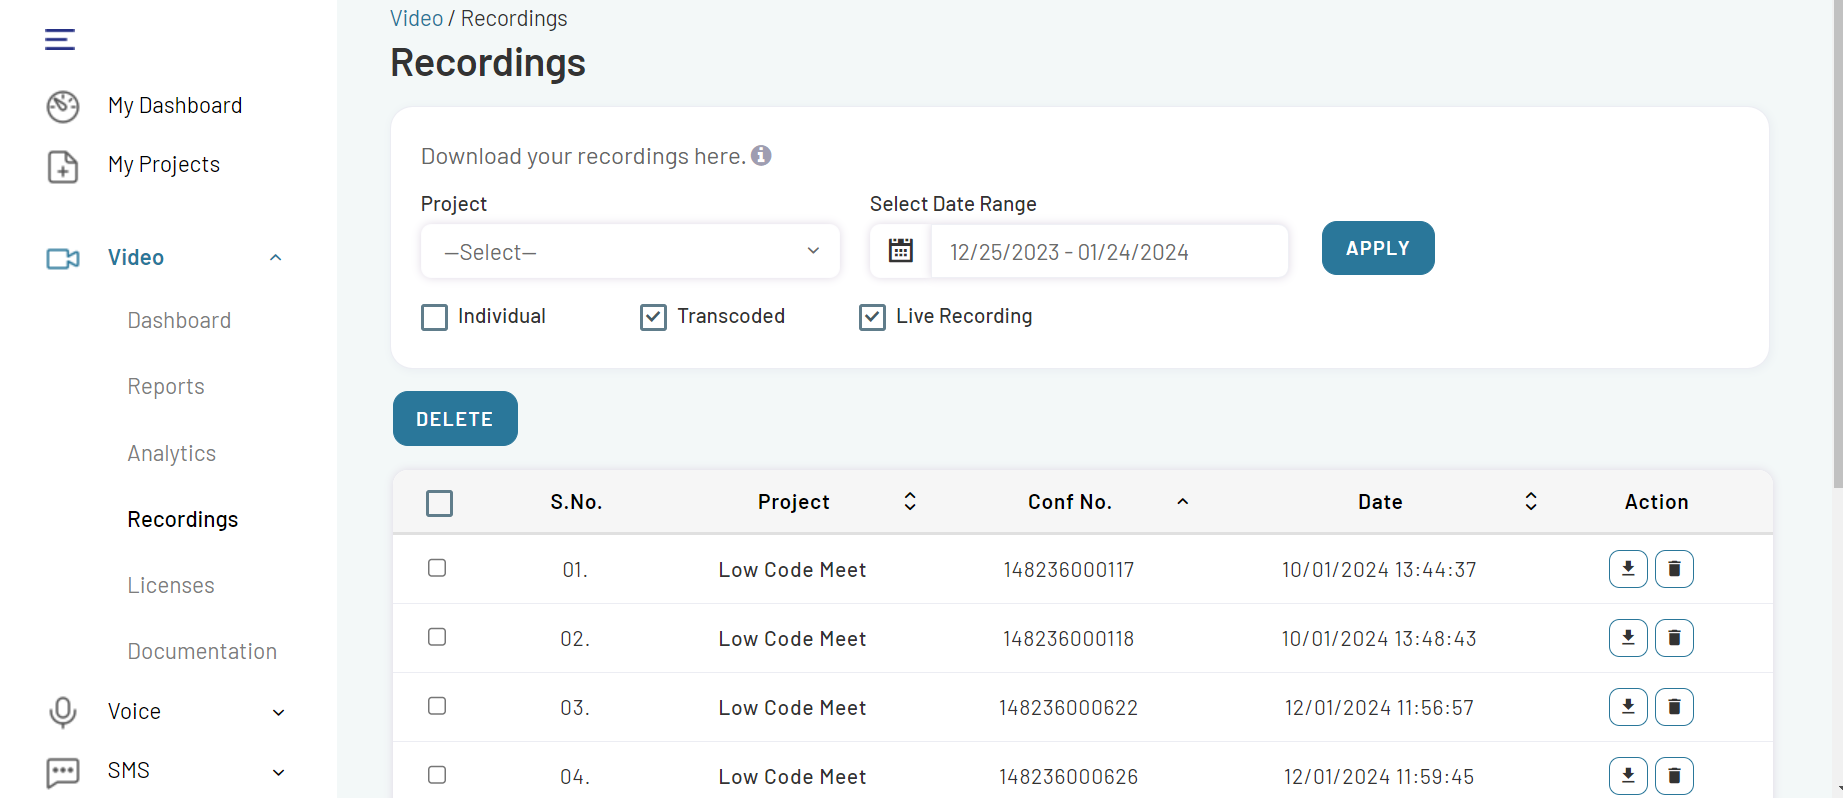
- Navigate to Video > Recordings.
- Click the Download link corresponding to a video session to download the recording of the session.
