Managing Contacts for the Campaigns
The Manage Contacts and Manage Campaign tabs appear once your phone number is registered with the WhatsApp Business platform.
The Contact Management section provides essential tools for efficiently managing your contacts. Each tab and feature serve a specific purpose to help you organize, update, and perform actions on your contact list.
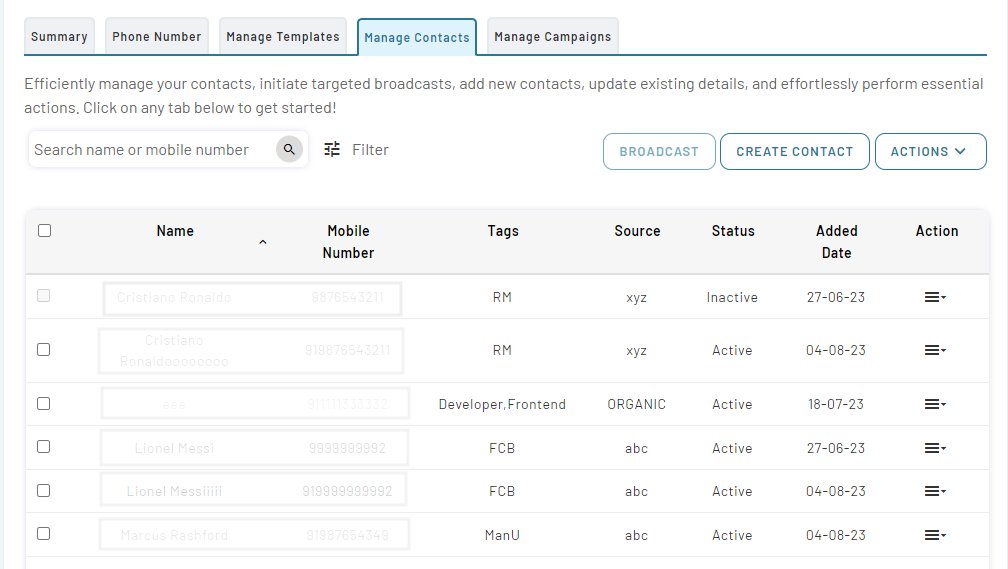
Create New Contacts
To effectively set up contacts for your WhatsApp campaign, follow these steps to create contacts in the project directory:
- Navigate to Manage Contacts tab.
- Select CREATE CONTACT tab. This will open the Add New Contact form. Provide the necessary details on the form.
- Enter the Name of the contact.
- Enter the Mobile Number of the contact. Use the country code drop-down menu to select the relevant country code for the phone number.
- Assign relevant Tags to categorize the contact. Choose from the previously used tags list or enter new tags to classify the contact based on specific characteristics.
- Specify the Source of the contact's information.
- If applicable, enter additional Custom Data for the contact in the Custom Data fields. You can add up to 10 custom Data fields.
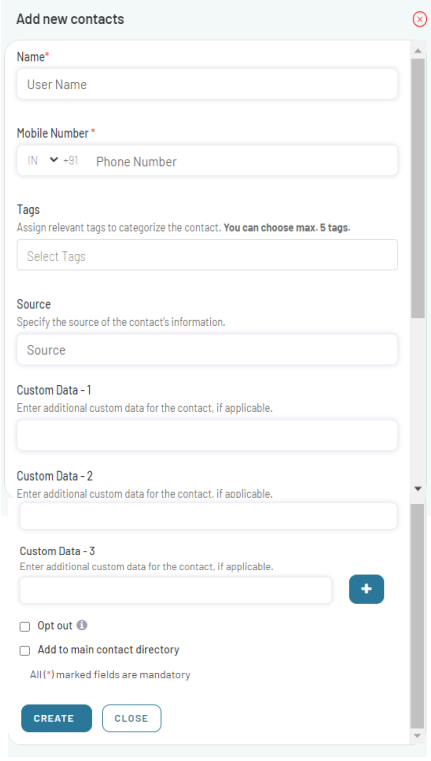
- Review the entered information to ensure accuracy.
- Click on CREATE button to save the contact. A confirmation popup will appear, confirming the creation of the contact.
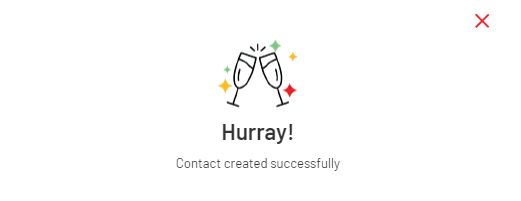
The contact will now be added to the contact directory of the project and will appear on the Manage Contact page.
Note: Duplicate phone numbers will not be added as new contacts, but user can update related attributes.
Manage contact
The Action section on the Manage Contact page offers a range of powerful features to enhance your project management and contact interactions.
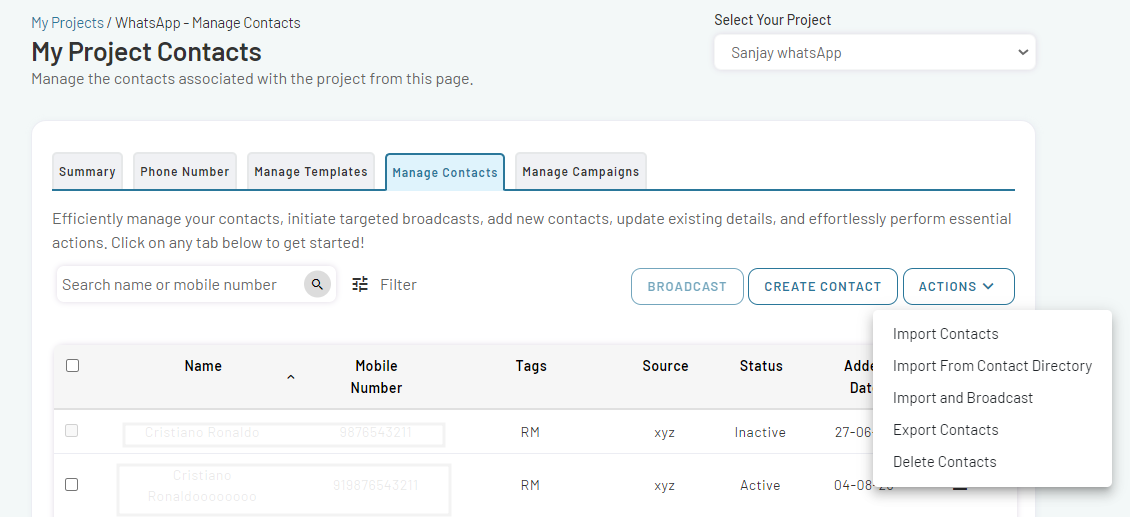
Import Contacts
To streamline the process of creating contacts, you have the option to import contacts in bulk using a CSV file. This file should include all the necessary contact information for your desired recipients. Follow the prompts to select the desired contacts file and import them into your project directory.
- Navigate ans click the Action tab on the Manage Contactpage.
- Select Import Contacts from the drop menu.
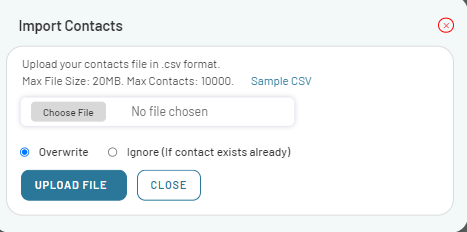
- Upload your contacts file in .csv format.
- The maximum file size allowed is 20MB.
- You can include up to 10000 contacts in the file.
- Refer to the Sample CSV file for reference if needed.
- Click on Choose File and select CSV file for upload.
- If any contacts already exist, you have the following options:
- Overwrite: Choose this option to replace existing contact information with the new data from the uploaded file.
- Ignore, if contact exists already: Select this option to skip adding contacts that already exist in your system.
- Once select your preference, click on UPLOAD FILE button to upload the selected CSV file.
Import Contacts from Main Contact Directory
The main contact directory serves as a centralized repository of contacts associated with the account. It encompasses the contacts from all the projects that have been given access to the main contact directory. The main contact directory simply provides a shared pool of contacts that can be accessed and utilized by multiple projects within the account. This structure allows for efficient contact management while maintaining the autonomy and distinctiveness of each individual project.
For more information, read How to Add Contacts to the Main Contact Directory.
To import contacts from the main contact directory, do the following:
- Navigate tand select the Action tab on the Manage Contact page.
- Select Import from Contact Directory option.
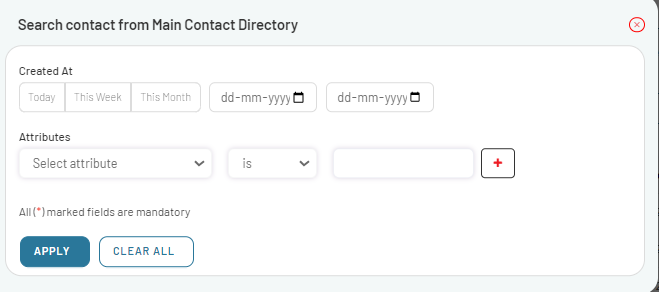
- Use the search field to specify the desired creation date range and attribute filters.
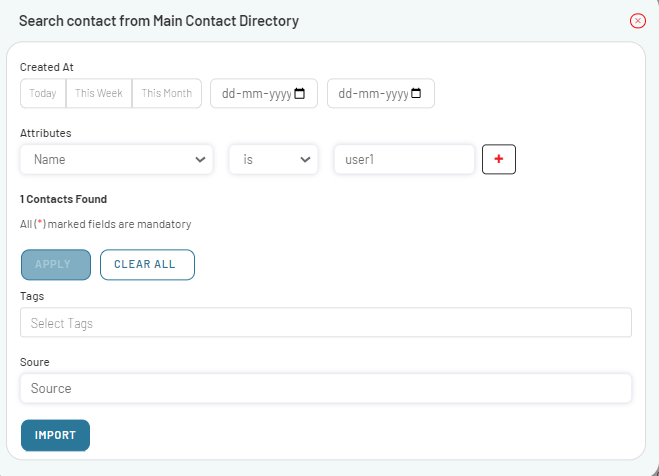
- Once you made the filter selection, click on APPLY.
- Select the Tag and Source as per your campaign’s requirement and click on IMPORT button.
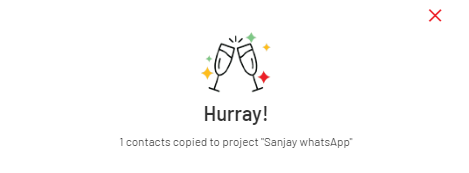
- The contacts will now copy to the project directory and will be shown on the Manage Contacts page.
Import and Broadcast
For immediate broadcast campaigns, users can import a CSV file with comprehensive contact information for their targeted audience, enabling swift campaign creation and immediate broadcasting. To import contacts and initiate targeted broadcasts, do the following:
- Navigate and select Action tab on the** Manage Contact** page.
- Select Import Broadcast from the dropdown menu.
- This selection will open the** CSV Broadcast 5-step wizard**.
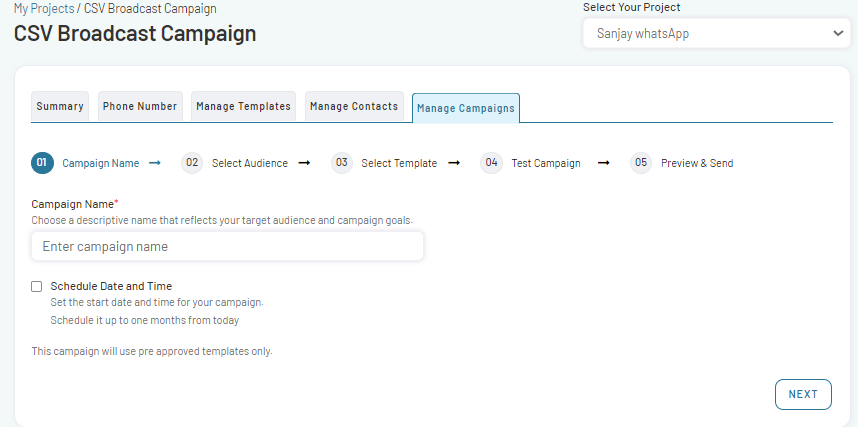
- Follow the prompts to configure and launch your targeted broadcasts.
Read more: How to create CSV Broadcast Campaign
Export Contacts
Users can export project contacts in CSV with relevant information such as name, number, tag, source, and custom data. This option allows for the secure sharing of audience details externally without granting account access. To export the contacts, do the following:
- Using the Filter option, Filter contacts by their creation date and assigned attributes.
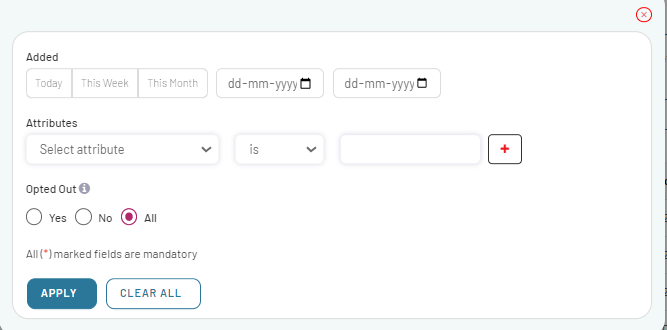
- Navigate and select the Action tab on the Manage Contact page.
- Select Export Contacts from the dropdown menu.
- Click on EXPORT button to confirm your action.

Note: The confirmation popup will display the number of contacts that have been filtered. If no filter is applied, all contacts in the project directory will be exported by default.
Deactivate Contacts
To deactivate contacts and restrict them from receiving further messages from your business, follow these steps:
- In the Project directory, go to the contact need to deactivate and click on Action icon next to it.

- Select Deactivate from the drop-down menu.

- Confirm your action, click on YES in the confirmation popup.

- The Contact will now deactivate successfully.